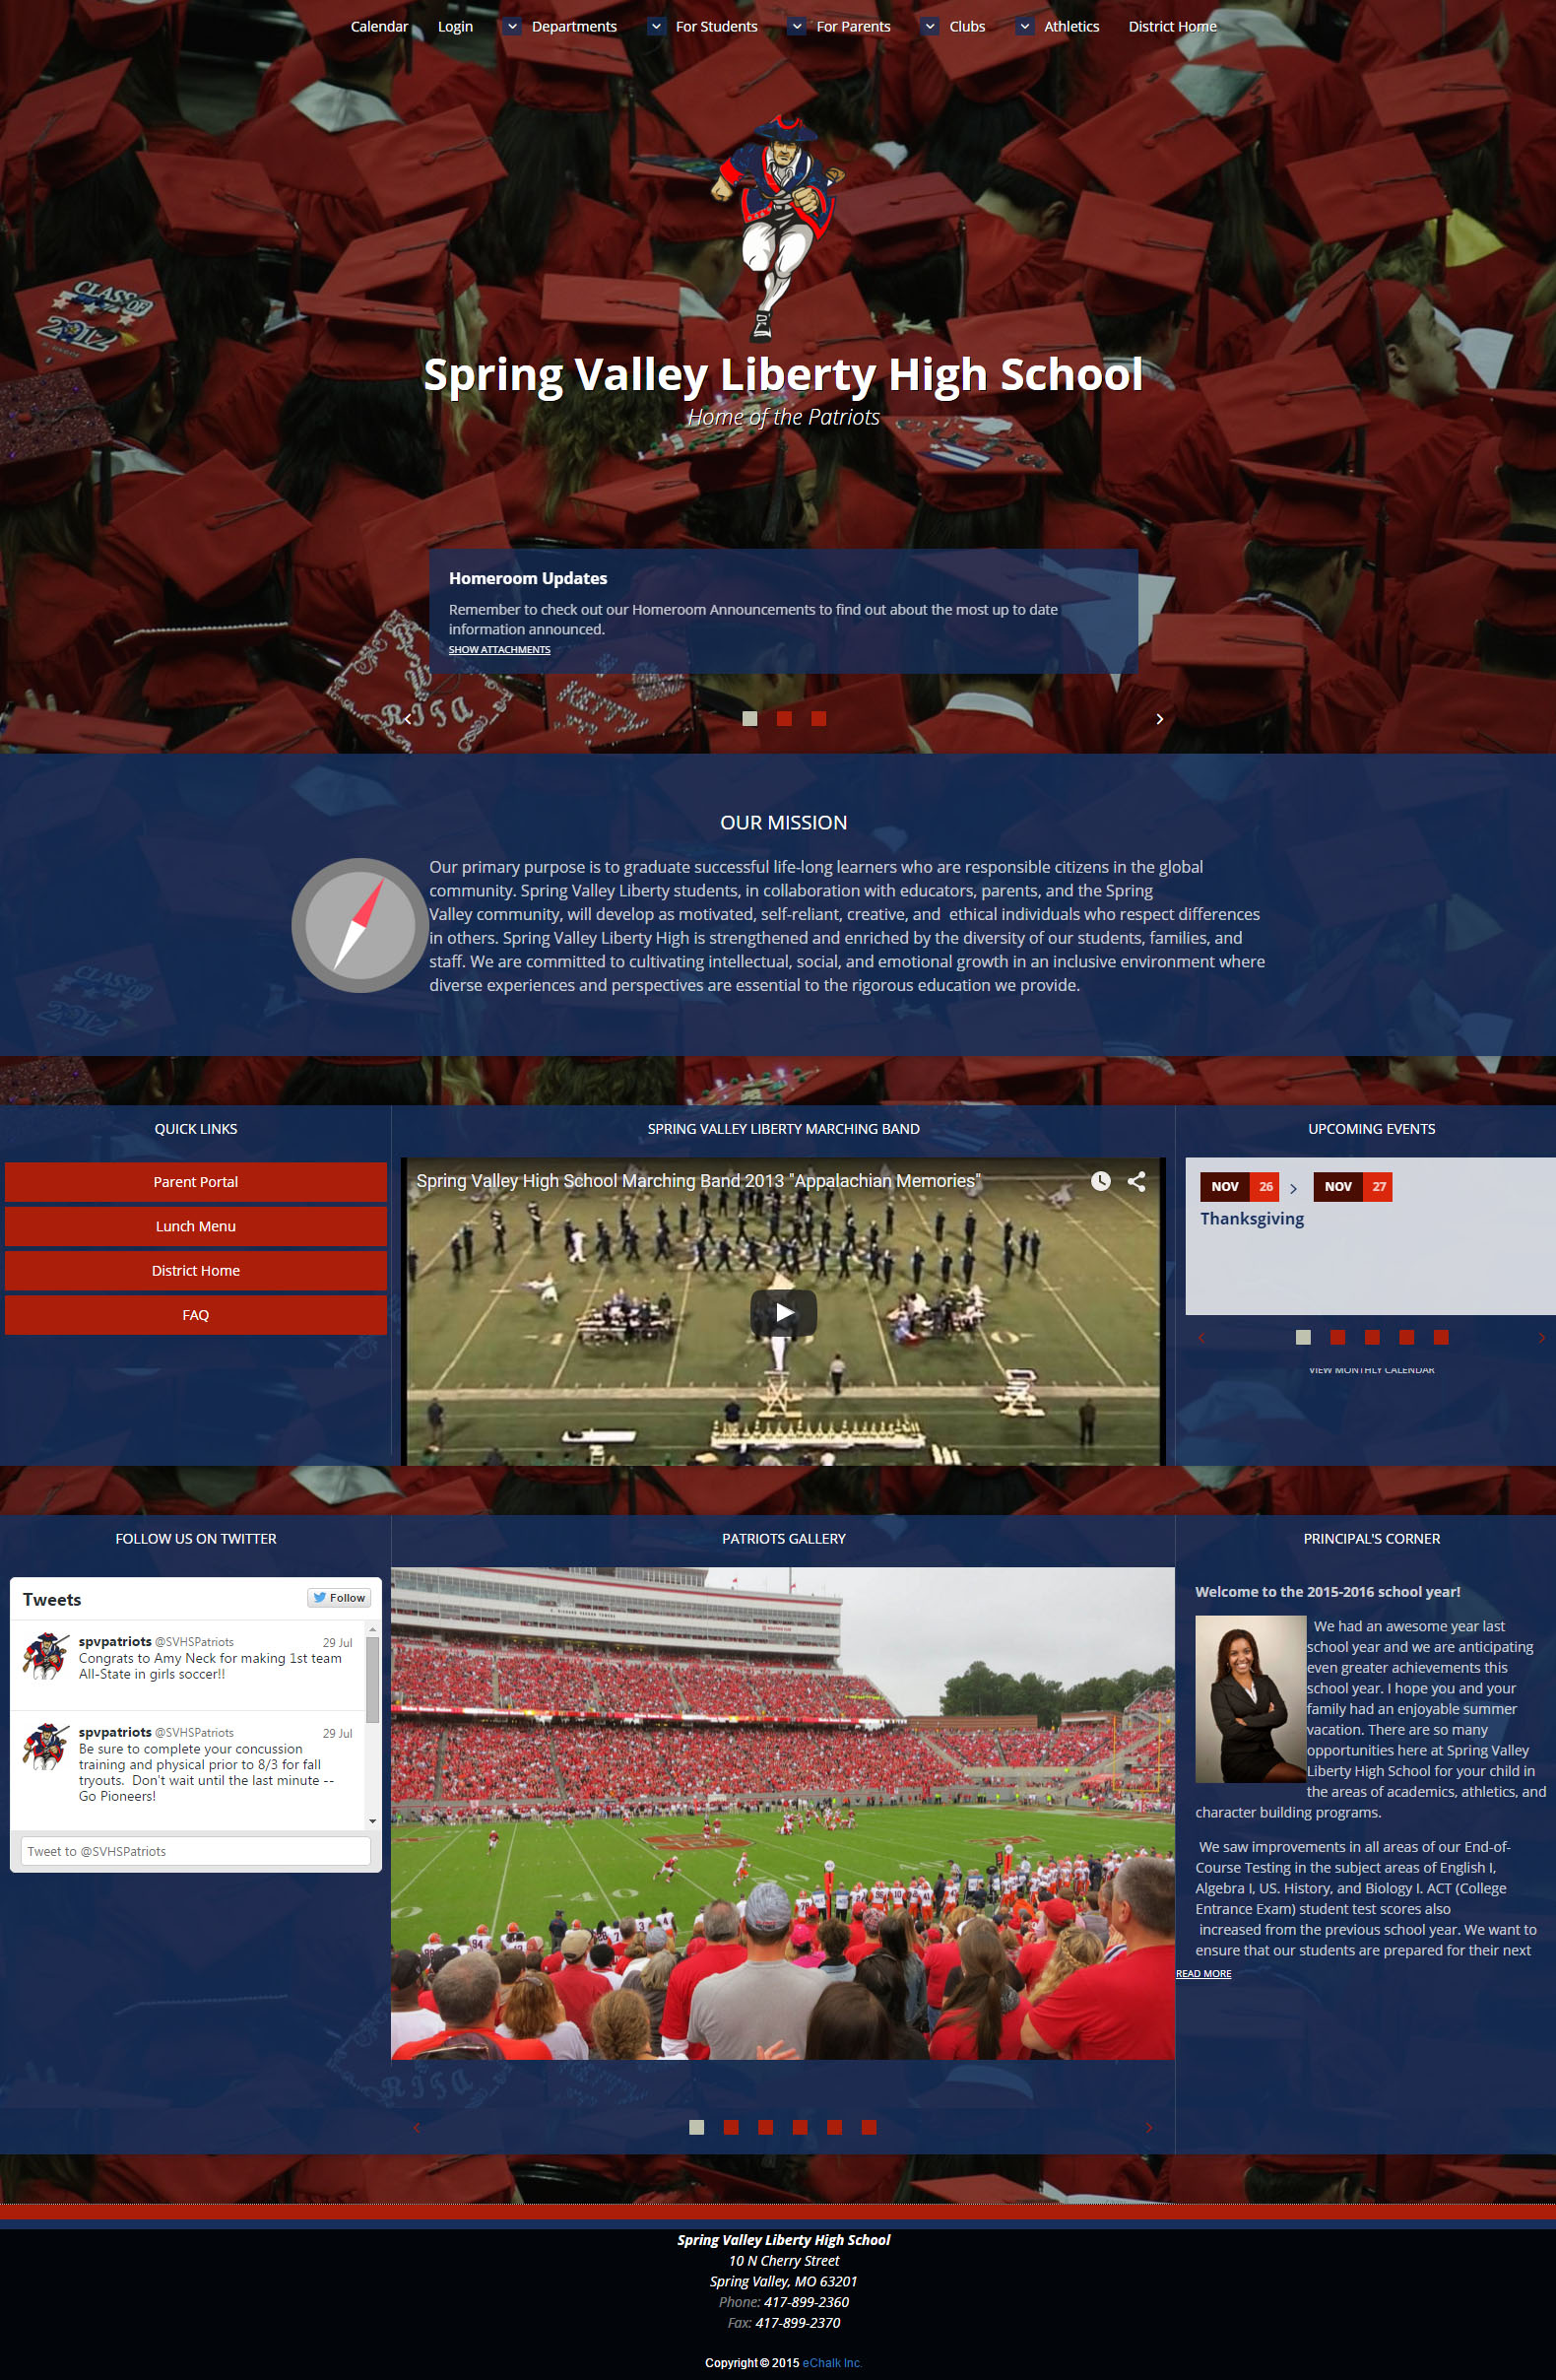
eChalk's new publishing tools will allow you to customize your school or district homepages and public subpages to create a unique presence on the Web. With so many layout options and ways to organize your site's content, the possibilities are endless.
To help you get started, here is a sample layout that your school or district can create for your own site using the Brochure Theme. The sample layout below incorporates media like a photo gallery, a video clip, and social media feed, along with events, a "Quick Links" area, a mission statement, and a Principal's message.
You can customize and change any parts of this layout to showcase information that's important to your school or district!

If you have not configured the Site Information, Navigation and display of the Header Feed, you can view instructions linked to below:
- Site Info: To update the site title, school colors and logo view instructions here.)
- Navigation: To create pages and create navigation links view instructions here.)
- Header Feed: To enable the display of a header feed where your site feed is displayed at the top of your homepage view instructions here.)
- Header Link List: To add a header link list that displays icons linking to your school's social media pages, view instructions here.
Below are the block titles and content types featured on this sample layout. To learn more about what types of content can be added to a Page click here.
Block Title |
Content Type |
| OUR MISSION | Text Block |
|
QUICK LINKS |
Link List Block |
|
SPRING VALLEY MARCHING BAND |
Video Block |
|
UPCOMING EVENTS |
Events Block |
|
FOLLOW US ON TWITTER BLOCK |
Social Block |
|
PATRIOTS GALLERY |
Image Block |
| PRINCIPAL'S CORNER | Text Block |
Where To Go
To create this layout for your new Homepage, you will log in to your site and click on the site tile. From there go to Manage Web Site > Pages.
What To Do
- Click on the green + button, enter a page title i.e. Home, and click Create.
- Click Edit to begin building your page.
- The URL will display for your new page. Click the pencil icon to change the page name or customize the URL.
- Click Add New Row.
- Select the 100% row layout and click Choose.
- Click Add Content and select Text from the menu. View instructions here to add a Text block.
- Click Add New Row.
- Select the 25% 50% 25% row layout and click Choose.
- Click Add Content in the left 25% block and select Link List from the menu. View instructions here to add a Link List block.
- Click Add Content in the 50% block and select Video from the menu. View instructions here to add a Video block.
- Click Add Content in the last 25% block and select Events from the menu. View instructions here to add an Events block.
- Click Add New Row.
- Select the 25% 50% 25% row layout and click Choose.
- Click Add Content in the left 25% block and select Social from the menu. View instructions here to add a Social Media block.
- Click Add Content in the 50% block and select Image from the menu. View instructions here on adding an Image block.
- Click Add Content in the last 25% block and select Text from the menu. View instructions here on adding a Text block.
- Click Done Editing to save the changes to your page.
- Click Preview to preview your page and/or click Publish to publish your page to the web.
- Click on Pages from the left menu and check the box next to the homepage you've just created.
- Click on the Make Landing Page button and the new homepage you've just created will display when visitors view your site.